Saturday, January 22, 2011

DIY: Faux Floral Twinkle Lights


I am planning a major move  mid spring of this year and I've been fantasizing about all the different ways I can decorate my future digs. When it comes to my bedroom currently it really isn't reminiscent of myself. I figure now is the best time to use up those Michael's gift cards. I will eventually use these lights for a four poster bed in an overhead motif in addition to delicate white bedding and sheer curtains.

This DIY project is relatively simple but time consuming.
Going in to this project you will need:

1.Twinkle Lights 
I purchased mine from Michael's in the floral section, they are meant to be used in floral arrangements and at 50 count the strand is 12ft long, this purchase cost me 13 dollars. However! This is an excellent time to make use of those excess Christmas light strands that have gone unused.
2. Floral Tape 
I personally used the smaller 1/4 inch round green strip, I'd imagine other forms of tape would work but my roll was 2 dollars and precut to the exact size I wanted.
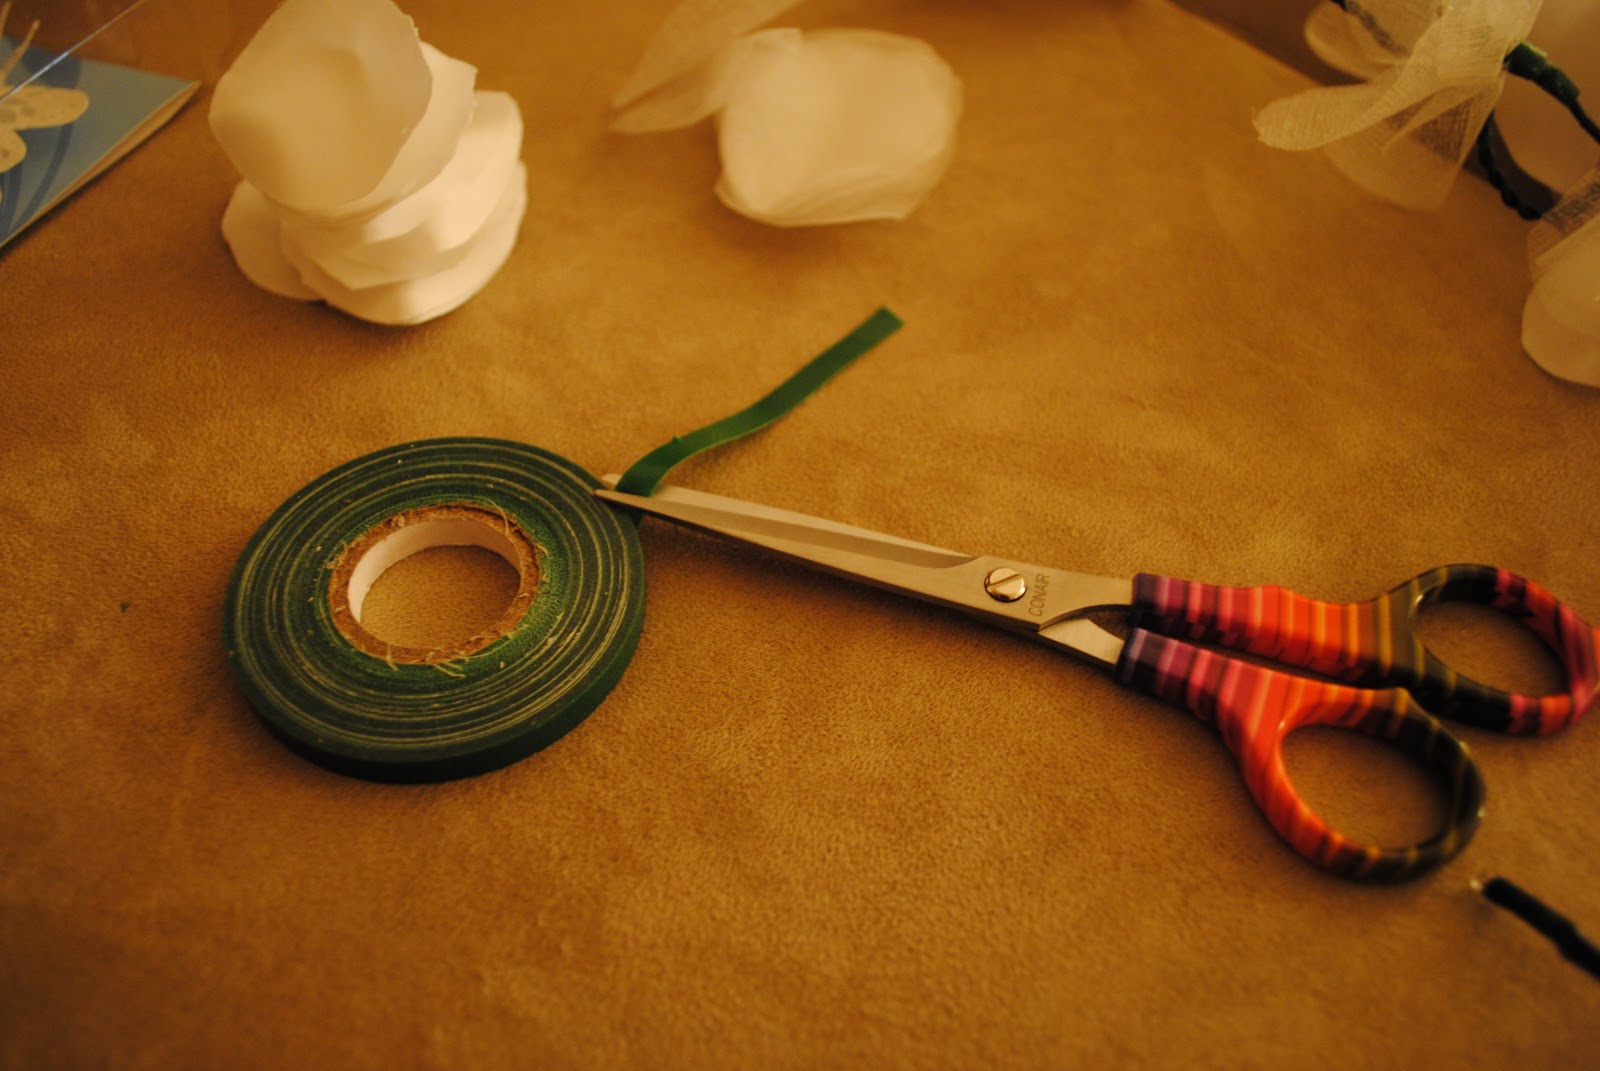
3. Scissors 
Small sharp point will work best. I used a pair of hair shears but that was because I was too cheap to buy a special pair for this project and my 'cutter-bees' are for paper projects only. Be ready to either clean or set this pair aside for future sticky projects because the tape will leave a residue on your utensil.


4. Faux Flower Petals
I bought a set on sale in the wedding section at Michael's for 7 dollars. That is because I had no desire to individually cut out pedal shapes of fabric for this project. Roughly 3-6 pedals on average per flower, 50 count lights, you see the agony in such a monotonous activity. This would be an excellent project to revamp some fake flowers from the salvation army.
5. Feather Butterflies
I had a set of 12 on hand from a previous project so I used the remainder of them to add a little extra to the piece as a whole. Variety is the spice of life. 


First make sure that all your lights are in working order, it would suck to do so much work on a dead strand of lights.

Caution, be weary of how rough you are with the light strand throughout the process, I was a bit rough with it toward the end and now 4 of my end lights will not light.


Pre-snip your pedals at the bottom of their base leaving at least 1/4 inch from incision to bottom of pedal. Enough to manipulate but not destroy.

You don't have to go in this specific order but I like to have all my materials ready on hand.


Tape the bottom most portion of your light. Using a sufficient amount of tape. This creates a stop so the pedals do not fall back on the strand.


Place pedals in your preferred method. I liked them staggered and varied some flowers had three solid pedals and other flowers had a mix. 
Similarly tape the top portion of the flower.

If it is your preference you can add in other accessory like the butterflies now or at the completion of the strand.


Jack's Digging it.

Time consuming but soooooo worth it. How amazing is this?


I think it will look terribly beautiful on a four poster hung loosely. Full of whimsy and charm. I adore this transformation. Because it is all taped on you can totally change it up later on if you like, and if color is your thing, a couple felt tip markers and this becomes an even more stunning statement.


Mission Statement

This blog serves as both a means to share instructional breakdowns of some of the projects I create or recreate. A way to express and share some of my more personal art work.  Show the objects and subjects of my affection and obsessions.
Another means in which to waste time.
I do not promise anything....Other than awesomeness.

Much in the way of Darwin, this thing will evolve with time.

For the record.

Laughter and tears are both responses to frustration and exhaustion. I myself prefer to laugh, since there is less cleaning up to do afterward.
-Kurt Vonnegut

Too true.
My name is Jody. I think of myself as being many things but for purpose of post I will express only an outline of my persona.

I am a 23 year old single mother of an exceptional redheaded boy, soon to be divorcee (but not bitter, at least not anymore). Full time art student, prior service military. I grew up in Northern California.
I am going to school for a bachelors in Graphic Design, what I will do with the degree at this point is beyond me. I assume that will be ironed out in time. I spend an exceptional amount of time at home crafting and creating and I am most in my element in that environment.


This is the face of the man my world revolves around.

I have a vast and growing bucket list. I am not actually a Jedi. I know, deal breaker.  I am entirely convinced I play a mean air turn table. I will more than likely embarrass the hell out of my son on numerous occasions throughout our lifetimes. 
I own a semi hairless cat named Jack.  I have a love obsession with jarritos mandarin soda and I hate wearing the color red. 
I make a lot of mistakes but settle up to an even and comfortable score with every day accomplishments. 

Recent love affairs with music would include but is not limited to:
Bon Iver
Lykke Li
Edward Sharpe & The Magnetic Zeros
Josh Garrel
Radical Face
Ratatat
Villagers
Camera Obscura


Internet Loves:
A Beautiful Mess
La Blogotheque
Wookiepedia

Currently Reading :
Divorce for Dummies
The Irresistible Revolution
100 Habits of Successful Freelance Designers

Friday, January 21, 2011

Introductions later, first things, first.

I could sit here for several hours.... Walk away for several minutes, and return to sit and obsess for several more wasted moments of my under indulged personal time.

So instead I am going to save myself the vast amount of time spent trying to think of an ingenious first post. Something that would make me appear as charming, creative, and intelligent as I already feel I am.


And post this instead....

Blog cherry popped*.


*Also known as the blog hymen.